
Welcome to our very first block masterclass from the Cornish Craft Barn!
For those of you who join us at any of our Wheal Stitch & Sit days here , you may know I’ve issued a fun little challenge: we are going to learn and stitch a brand-new patchwork block together each session. I thought it would be lovely to share this to those of you who are too far to visit but wanted to join in with the stitching.
Whether you are planning to save your blocks to build a spectacular sampler quilt, turn them into cozy cushions, or if you’d rather share them – post them to us to be pieced into our Wheal Community Charity Quilt where I’m donating the backing and quilting it once we have enough!
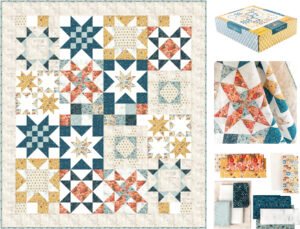
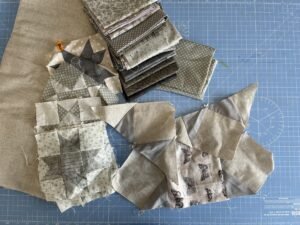
Today, we are tackling a timeless, beloved classic: The Ohio Star.
🤫 Rachel’s Machine-Piecing Tip
My best tip? I very rarely use pure white thread! White thread is simply too bright; it fights with your fabrics and stands out like a sore thumb across your seams.
Instead, I do almost all my machine piecing using a either a beautiful variegated grey thread (specifically the ultra-smooth Aurifil cotton) or a beige or pale grey Gutermann cottonb. These colours behave like chameleons—they effortlessly absorbs the tones around the thread and they melt right into your fabric choices, keeping your structural thread choices beautifully hidden!
How to Make a 12-inch Finished Ohio Star Block
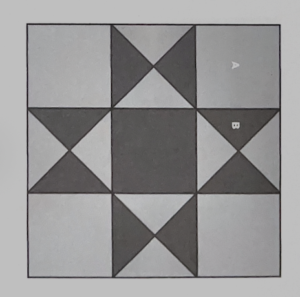
The Ohio Star looks intricate and advanced, but it is actually built on a straightforward 3×3 layout. The only trick is creating the four hourglass units that make up the star points, known technically as Quarter-Square Triangles (QSTs). Let’s break down exactly how to cut and sew it step-by-step.
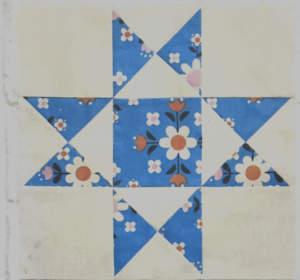
📐 The Cutting Guide
To make your star geometry crisp and distinct, choose one clean Background Fabric and one vibrant, high-contrast Star/Accent Fabric (our new small-scale flowery collections work beautifully for this!).
From your Background Fabric, cut:
Four 4½-inch squares (for the four outer corners)
Two 5¼-inch squares (to create the triangle units)
From your Star/Accent Fabric, cut:
One 4½-inch square (for the exact center of your star)
Two 5¼-inch squares (to create the triangle units)
🪡 Step-by-Step Assembly Instructions
Step 1: Make Your Hourglass (QST) Units
Take one background 5¼-inch square and one star 5¼-inch square and place them right sides together.
Draw a precise diagonal line from corner to corner on the back of the lighter fabric. Sew an exact ¼-inch seam down both sides of that drawn pencil line.
Cut directly down your drawn line. Open and press the seams toward the darker fabric. You now have two standard Half-Square Triangle (HST) units.
Now, take those two new HST units and place them right sides together. Make sure they are rotated opposite each other so the background fabric of the top unit faces the star fabric of the bottom unit, nesting that center diagonal seam perfectly together.
Draw a new diagonal line across the back, cutting perpendicularly directly across your original stitched seam line. Sew ¼-inch down both sides of this new line.
Cut down the line, open them up, and press carefully. Magic! You have your beautiful hourglass blocks. Trim these units down to exactly 4½-inches square. Repeat with your remaining pair of 5¼-inch squares so you have four finished hourglass units in total.
Step 2: Lay Out the 9-Patch Grid
Clear a space on your sewing table and lay out your nine cut pieces in three rows of three, just like a classic tic-tac-toe grid:
Top Row: Corner Background (4½”) ➔ Hourglass Unit ➔ Corner Background (4½”)
Middle Row: Hourglass Unit ➔ Center Star Fabric (4½”) ➔ Hourglass Unit
Bottom Row: Corner Background (4½”) ➔ Hourglass Unit ➔ Corner Background (4½”)
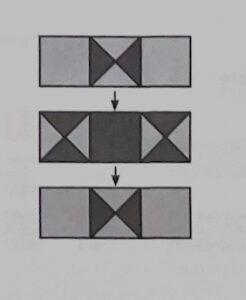
Step 3: Stitch the Rows Together
Thread your machine with your subtle coloured thread and chain-piece the blocks in each row together using a standard crisp ¼-inch seam allowance.
Pressing Tip
: To ensure your final block corners match perfectly without any awkward bulk on the intersections, press the seams of the top and bottom rows outward (away from the triangles, toward the plain background squares). Press the seams of the middle row inward (toward the center focus square). This allows your seams to lock and nest together beautifully
when you sew the horizontal rows together!
Give your finished block a wonderful final press with a hot, dry iron. Your assembled block will measure 12½-inches right now, which means it will sit as a perfect 12-inch square once it’s sewn into your final quilt layout!
📸 Join the Show & Tell!
If you try this tutorial at home, we want to see your fabric color choices! Email us a high-resolution photo of your finished Ohio Star block, or post it on Instagram and tag us directly a
t @coastandcountrycrafts so we can see your projects!
Happy stitching, and if you’re local – we look forward to seeing you at the Barn soon!
Rachel x
